Pages

Monday, October 7, 2019

Nocturne Blocks 10 and 11


Block 10 is the final block of Nocturne's garden.  The embellishment includes stitches you've used on previous blocks but there is a little "tweaking" required.  

First, sew the side seams of Block 9 and 10 together, with Block 9 on the left side.  Press the seams open.  

Let's begin with the tall flower that is on both blocks 9 and 10. Fold and tape the template pages for Blocks 9 and 10 to match the lines of the flower as shown below:


Oops, the flower center is missing!  Draw the missing part in as shown on the red line:

Sorry about that!  


The template page shows 2 leaves on the left side but I added an extra one because I had space to do it and felt like it balanced out the lavender stem on the right side.  

Draw in a line for the lavender stem with a chalk pencil.  Remember to begin stitching the Bullions at the top of the stem, working down one side and then repeat for the other side to minimize wasting thread on the back.


Sew all of the blocks together by machine with a 1/4" seam allowance and press the seams open.  As mentioned before, use plenty of pins to hold the blocks in place for sewing to avoid stretching the wool.  If your sewing machine has a walking foot, use it to make this step even easier.  I also recommend using a Strip Stick when pressing the seams to avoid crushing your embroidery.

Press the center seam very well to make it as smooth as possible and avoid "lumps" showing through the tree trunk.  

Block 11 - Tree Trunk
Trace the sections of the tree trunk on the template page to a long piece of freezer paper and cut out on the drawn lines.  Lay this freezer paper template over the center seam and make any needed adjustments to the trunk before ironing onto the wool.  Remember, there is a leaf at the top of the tree, shown on the template pages for Blocks 1 and 2.

Pin the tree trunk in place and applique as you have the other blocks.  I found this was much easier to do with the quilt laying flat on a table.  Applique the top leaf in place and embellish using the same thread and stitches as for the leaves on Blocks 1 and 2.

I did a Back Stitch around the tree trunk, and asked my machine quilter, Cindy Paulson, www.quiltedconnection.com to add quilting in the trunk.

Here is a short video of How to Stitch the Tree Trunk

Nocturne
A Magical Nighttime Garden

Congratulations on finishing this project.  If you haven't already joined my Facebook group, Kerry's Crazy for Embellishment, please join today, post photos of your progress, and keep posted on my next design coming in Spring 2020.

Monday, September 2, 2019

Nocturne Blocks 9 and 10


I'm combining blocks 9 and 10 so you can see how the center flower is placed after blocks 9 and 10 are sewn together.  Notice that I've also left room on the left side of Block 9 for the tree placement.


 The template page for block 9 has a large circle for the flower center which is cut from yellow wool.  Begin a chain stitch on the outside edge of this wool and continue chain stitching towards the center.  I left a circle of yellow wool showing that is about 3/8".


The vein of the leaves is Mountmellick Stitch which is quite similar to a Crested Chain Stitch without the knot at the top of the straight stitch.  If this stitch is new to you, practice on a scrap piece of wool to get the steps of this stitch down and the stitch size right for the leaves.


I was excited to get my bunny stitched just because she is so cute.  Begin by drawing the entire bunny onto freezer paper.  Not just the outside edge, but the front hip/leg and the ears too.  Cut out the full bunny and iron onto the gray wool then cut out the entire bunny.


After the gray bunny is cut out of wool, cut the pink section of the ears and the front leg from the paper template.  Place these freezer paper patterns on the appropriate color of wool and iron in place.  Now cut out close to the edge of the freezer paper and stack on top of the gray bunny.  This method gives more dimension to your bunny and the pieces fit exactly as they were cut from the same pattern.  Just applique in place.


Block 10:
Sew the right edge of Block 9 to the left edge of Block 10 by machine with a 1/4" seam allowance.  Press the seam open.  
Pin the tall flower for Block 10 so the stem covers the seam and the flower extends onto both Blocks 9 and 10.


I have to admit to a mistake on the template page for the tall flower with the curvy lavender stem.  I forgot to draw in the yellow flower center.  Please draw yours using the above photo as a guide.  I've also been told that the template page shows only 4 leaves - not 5. 

I drew the curvy lavender stem with a chalk pencil, giving me a line to follow for my stitching.


Sew the top edge of Blocks 9 and 10 to the bottom edge of Block 6.  

Place the right and left sections of Nocturne right-sides-together and pin this center seam, matching the seams of the tree blocks.  Sew together with a 1/4" seam allowance and press the seam open carefully so you don't crush any embroidery.

Get excited!  You're almost finished!  Next, we add the tree trunk.


Wednesday, August 7, 2019

Nocturne - Block 8


My first thought when I look at this block is that it's quite simple.  Just one plant with blooms in different sizes, showing off one of my favorite color combinations - orange and pink.  When I was growing up no one I knew would dare pairing these colors.  It was a rule.  I'm so happy to be a grown-up (for a very long time) that feels completely free to break the rules.


My first suggestion for this block is to notice that this bloom fits quite tight in the background.  Some of the "seeds" on the lower bloom spill over onto Block 7 and the "seeds" on the flower above the bud are very close to the tree trunk (see photo inside your pattern).  Be careful with your placement as you don't want to do any of the dreaded unpicking when you add the tree.


Top Bloom:

Draw a petal shape on each side of the pink wool using a chalk pencil.  No template is needed for this, just draw it in unafraid, remembering that all petals aren't the same size.

These 2 petals will be covered with Double Pekinese stitch which begins with Back Stitch that is then woven back and forth.  I have to refer to my Right Handed Embroiderer's Companion (or Left-Handed for you lefties) each time to get my weaving started off right.  The books are available in my Etsy Shop if you don't already have one.

Tip:  The key to a successful Double Pekinese is stitching the same number of Back Stitches on each side of the petal.

The area between the petals is filled with randomly placed Straight Stitches.  

Tip: Make your first stitch near the top at an angle, filling in with stitches of slightly different lengths and at different directions.  Don't go crazy with this - leave some space between the stitches.

Outline with Bullion Knots.

3 More Blooms and a Bud:
The center section of the remaining blooms and the entire bud are covered with Double Pekinese stitch.  Notice that these smaller blooms are not divided with petals.

Seed Heads: 
Each bloom has 3 long straight stitches radiating out from the center which is then couched down with the same thread to keep it in place.

The seeds are 3 wrap French Knots using 2mm silk ribbon.  You may want to add the French Knots on the lower left bloom after you stitch Blocks 7 and 8 together.

Tip:  Leave some space between the French Knots rather than "packing" them together.  I used  1 package each of Painter's Thread silk ribbon in the colors Longon and  Pomelo.   


The stems and center leaf are embellished with Fly Stitch. I like using variegated threads that bring the colors of the stems/leaf and the blooms together beautifully.

The outside leaves are embellished with a series of Straight Stitch and Detached Chain Stitches (Lazy Daisy) using Shimmer Floss. 

Our next block includes the bunny which I think many of you have been looking forward to.  I love him.


Wednesday, July 10, 2019

Block 7 - Nocturne

The branches of the Nocturne tree with it's beautiful birds and blooms are complete and now we move onto the garden blocks.  


Applique the the large flower with its stem, pod flowers, and leaves in place with small whip stitches as on the previous blocks.


Tip:  When cutting out the wool for the pod flowers, 

  1. Trace the entire shape onto freezer paper, iron to the Tango (orange) wool and cut out.
  2. Remove the freezer paper and cut away the scalloped edge.
  3. Iron the remaining freezer template (without the scalloped edge) to the Turquoise wool, cut out close to the template and remove the template.
  4. Cut away the template on the remaining drawn line.  Iron the small piece to the Plum wool, cut out and remove the template.
When you pin the pieces in place just stack the Turquoise on top of the Tango and the Plum on top of the Turquoise.  By using this method, there is no matching of pieces and you have more depth to the flowers.

For the second Pod Flower, use the same templates, just iron them close together on the Tango and Turquoise wool.


Embellishment Fun:

Large Flower:
This flower is outlined with Crested Chain Stitch.  If you have never used this stitch before, I recommend a little bit of practice.  You may find it easier to start with a #8 Pearl Cotton to learn the 4 steps for each stitch.  Once you are comfortable with the sequence of the stitch, practice with some extra Silken Pearl #5.  The secret to having your stitches look like those in the photo is beginning with a very small chain stitch.  While there are a few steps to this stitch, the end result is worth it.

Flower Center:  Begin the center by stitching 4 Fly Stitches with long anchor stitches.  Imagine the center flower is a clock and place your stitches at 12, 3, 6 and 9 o'clock.
Now, add 4 more fly stitches between the first ones with shorter anchor stitches.
Add a Bullion Knot in the "V" of each Fly Stitch and a French Knot in the center.

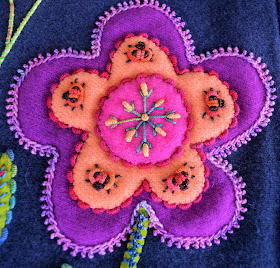
Inner Petals:  Add a Lady Bug as explained in the pattern to each petal.  I thread 2 Bullion Knot needles, 1 with each color of thread and just move the needle/thread out of the way as I stitch the next color.

Both the Inner Petals and the Center are outlined with Bullion Knots.


Flower Stem:
Embellish the stem with Palestrina Stitch with the horizontal stitch stretching from one side of the stem to the other.  Don't be tempted to pull the thread tight when making the knot.  Pull slowly to obtain the round shape.  Pulling too tight on the thread loses the detail.


Pod Flowers:
I really like the single Oyster Stitch on the Tango scallops.  Sometimes a simple embellishment is all you need.  My tip for making the Oyster Stitch is don't pull the thread too tight.  Take it slowly to get the nice rounded shape.

I've found that running the Sea Grass through a thread conditioner like Thread Heaven or a similar product, helps to take the kinks out and keep the thread flat as you stitch as on the Fly Stitch used on the Turquoise.  Confession:  when it was announced that Thread Heaven was discontinued I purchased every bit I could find.  I'm still using this stash and can't recommend another brand.

Just 3 Cast-On stitches is all you need to embellish the Plum wool.

Couched Stems:

Draw a line with a chalk pencil for the stem to the top Pod Flower and the swirl on the flower stem.  Double thread a #5 Pearl Cotton into a #22 or #18 Chenille needle and pull up from behind at one end of the drawn line.  Lay these threads side-by-side as you couch them in place with a #8 Pearl Cotton.

Single Oyster Stitches with #5 Silken Pearl complete the swirls.

Leaves:

After stitching the center of the leaves with Fly Stitch and outlining with Bullion Knots, I decided they needed a little bit of color.  I threaded a #22 Chenille needle with #5 Silken Pearl and coming up from the back at the base of the Fly Stitches, whip each Fly up the center and then take the needle to the back and tie off.  

Have fun and find some shade to stitch Block 7.


Monday, June 3, 2019

Nocturne - Block 6


Block 6 will complete the Nocturne tree branches.  There are some similarities here to Block 5 with a few exciting twists.

Large Bird:
Look back at the tips for Block 5 for a reminder of how to cut the tail sections and stack them as you applique.  The embellishment on the Block 6 tail is exactly the same as the large bird on Block 5.

The wings are outlined with the Closed Buttonhole Stitch and Silken Pearl size 5.
Use a circle drawing template to draw the circles for the Whipped Spider Webs inside the wings with a chalk pencil.  The chalk pencil rubs off easily just in case you want to change the position of a circle.

Mark a spot for the eye button then add the Pistil Stitches.  Use the same thread to sew the eye button in place.


Small Bird:
Now, look carefully at the small bird in the above photo.  According to the pattern you embellish the bird the same as the small bird in Block 1.  But..... I didn't.  For this bird I used a Fly Stitch that branches and extends off the wool bird.

Flowers:
A single flower is on Block 5 but I love flowers so we have 2 on Block 6.  Both flowers use the same threads but the embellishment is different.

I used my circle drawing template to draw a 1" circle in the center of the flower and then Back-Stitched on the drawn line with Silken Pearl size 5.  Make the Back Stitches as close to the same size as possible and don't pull too tight so you can easily slide your needle under them as you stitch the Spiral Trellis with the same thread.

Surround the Spiral Trellis with 8 Oyster Stitches.  Don't pull too tight to have more definition in the stitch.

Finish off the flower by outlining with small Chain Stitch.

This flower center is a Cast-On Stitch Rose.  Make the first Cast-On in the center of the flower and continue to work Cast-On Stitches around the first one until it is the desired size.  Begin each new Cast-on slightly under the the previous one.

Add petals of Double Cast-On Stitch around the rose and outline the flower with small Chain Stitch.

Berries


Stitch a Buttonholed - Bullion Knot Wheel with 8 spokes on each berry.  Mary Corbet has excellent instructions for making a Bullion Knot Wheel trimmed with Buttonhole Stitch HERE.  I did mine just a little bit differently.
  • Use the thread and needle size specified in the Nocturne pattern.
  • There's no need to mark the dots.  Just "eyeball" the spokes and it will be OK.
  • Notice that all of my Bullion Knots end in the center of the berry.  I didn't draw a small circle in the center to add French Knots.  Add a Drizzle Stitch in the center.
In the above photo you can see the definition in the Palestrina Stitch stem achieved by not pulling the stitches too tight.


Joining Blocks
Pin the top of Block 6 to the bottom of Block 4 and sew together by machine, using a 1/4" seam allowance.  Press the seam open.
Mark and stitch the vine in place using the same thread and stitches as used for the vine in Block 5.

I hope you are all loving your progress on Nocturne.  Block 7 will begin the beautiful garden beneath the tree.

Monday, May 6, 2019

Nocturne Block 5


It's important to notice a few important things about this block:

  • First, see the leaf pinned at the top?  I'm saving it to add after Block 3 and Block 5 are joined together.  
  • The branch extends all the way to the right edge of the block. This way I'm certain that the tree will cover it.
  • I could have continued the top berry stem to the edge but if the tree doesn't cover it I can easily add a few stitches.
Large Bird:
When you trace the Bird template onto freezer paper, include the beak and upper curved portion of the top wing.  This will give a base for the woven picot to be stitched onto for the beak and help in placement of the wing.

The bottom wing is covered with Closed Buttonhole Stitch.  I began at the point of the wing and stitched along the bottom edge of the wing to the curved edge, tying off the thread in back.  Begin the 2nd row right above the first and stitch from left to right as with row 1.  If you are left-handed, begin on the opposite edge. 


Trace the entire tail onto freezer paper and cut out.  Iron the freezer paper onto the Turquoise wool and cut out.  Remove the freezer paper from the Turquoise wool and cut away the outside tail sections from the freezer paper.  Iron this "reduced" freezer paper template onto the Plum wool.  Remove the freezer paper from the wool and again cut away the side sections from the freezer paper.  Iron the center of the tail onto the Chartreuse wool.


Stack the 3 tail pieces as in the above photo, and whip stitch in place.  This method gives more dimension and since all the colors are cut from the same template there's no fussing to make them fit.

Leaves and Stems:


I absolutely love the variation in colors on the Macke Pearl Cotton that I used to embellish the leaves and berry stems.  This thread  brings all of the colors in the block together.

The stems from the leaves to the tree branch are stitched with this same thread using a Stem Stitch.  Add a double Lazy Daisy Stitch for small leaves on the stem.  Stitch a Lazy Daisy (detached chain) making the anchor stitch just a little longer than usual.  Bring your needle and thread up from the back in the same beginning hole and slide the needle through the anchor stitch, then take it to the back.

Berries: 


The berries are outlined with Bullion Knots that are slightly overlapped.

Joining Blocks:


Pin the "top" of block 5 to the "bottom" of block 3 and sew together by machine using a 1/4" seam allowance, press the seam open.

Add the leaf saved from Block 3.

Stitch the vine that extends from Block 3 to Block 5.  
  • Mark a line for the vine with a white chalk pencil.  
  • I found the easiest way to stitch the vine was to begin at the end (away from the Block 3 branch).
  • Stitch a Lazy Daisy for the end of the vine and 2 more on each side of the drawn line.
  • Move a little bit down the line and stitch a Lazy Daisy on each side of the line.
  • Make 1 Back Stitch from the 1st set of Lazy Daisy "leaves" to the next set.  Continue in this manner along the line.
I hope you are having a wonderful time with Nocturne.  There is just 1 more block for the branches then we will begin the garden with Block 7.


Tuesday, April 9, 2019

Nocturne Block 4


It is so tempting to stitch Block 2 and Block 4 together so we can get started on the funny little gold Looney Bird. Let's take it a step at a time to make it easier and save the best for last.

Begin by appliquing all of the motifs in place including the Looney Bird's tail feathers.  Notice that the tail feathers run under the branch.

Leaves:
The small leaves at the base of the flowers and 2 of the leaves on the upper branch are embroidered with Fly Stitch in the center of the leaves and outlined with Back Stitch using size 5 Pearl Cotton.  The 2 leaves at the end of the branch use the same thread but are stitched with Buttonhole Stitch running along the center and French Knots on the other side of the leaf.


The flower stems are Palestrina Stitch using the same size 5 Pearl Cotton.  This variegated thread color is Macke by Painters Threads and I love how it picks up the other colors in the block.  

Tip:  To achieve more definition in the Palestrina
Stitch don't pull the stitch too tight.  I like to
use a Bullion Knot needle for this stitch.

I have made a short video to show how to stitch the bottom of the green flower base which you can find "Here"

Pattern Correction
Use a Bullion Knot Needle when outlining 
the flower with Sea Grass.
and
The Drizzle Stitches are made with Rousseau #8.


The head feathers are 2 double Fly Stitches.  This just means that there are 2 fly stitches very close together, one on top of the other.  Add a Lazy Daisy Stitch inside the "v" of the top Fly Stitch.


Don't be afraid of the the bird's wing.  In the above photo notice that I began a row of cast-on stitches at the bottom left of the wing and continued working to the right until I reached the top of the wing.  The next row is begun once again at the left side and continues to the top of the wing when completed.

Continue in this manner until the wing is covered.  Notice that you can see the wool under the rows of stitches.

Another oops:  The final step to 
completing the bird is to outline the body with 
Back Stitch except for the breast which
has Fly Stitch.

Sew the bottom of Block 2 to the top of Block 4 by machine with a 1/4" seam allowance.  Use pins about every inch to avoid stretching the wool as you sew.  Press the seam open

Now it's time to applique the Looney Bird in place.  Use a chalk pencil to mark the wings and then Back Stitch with the Frida Shimmer Floss.  The same thread is used to Fly Stitch in the center of the wings and the tail feathers.

Drizzle Stitches give this bird some wild head feathers.  He makes me smile.

Monday, March 11, 2019

Nocturne Block 3


I really love the pretty birds on this branch.  There is some "free-form" embroidery on their breasts which is going to be much easier than you may think.

The above photo shows the leaves and small red flowers that extend from Block 1.  Wait to add these applique motifs until Block 1 and 3 are sewn together and it will be easier to line everything up and stitch the stems.

Note:  I recently started using a Chenille #22 needle
for the embroidery where the pattern calls for a size 24.
I find the #22 is easier to thread and there is less
wear on the embellishment threads.

Let's start with the bird on the left side of the branch.


Tail
Back stitch around the top and sides of the tail.  Make 2 Fly Stitches at the top and then Back stitch a line down to the wing. Change to the contrasting colored thread and weave through the Back Stitch on the inside of the tail.  Add a Lazy Daisy in the "V" of each Fly Stitch at the top of the tail.
That was easy and your confidence level is now high enough to tackle the flowers on the breast.


Breast - left bird:
1.  Place the upper spider-web flower by making 5 Lazy Daisy stitches.  These stitches will be the foundation to weave over and under to make the flower - the Lazy Daisy stitches should be large enough that the ends extend past the weaving to indicate leaves.

2.  Use the same technique to add another flower below and a little to the left of the first flower.

3.  Add the blue Lazy Daisy flower between the wing and the spider web flowers.

4.  Add the curved line of Wheat Ear stitches, ending the line at the flowers.  Add color to this line by adding Back Stitch and French Knots or Colonial Knots.

5.  Now just fill in the spaces with French Knots or Colonial Knots in several colors.

I just like to eyeball where to place the flowers and vine but it's OK to mark lightly with a chalk pencil.

Breast - right bird:
1.  Begin by stitching the Bullion Rose. I'm not embarrassed to say that I can never stitch 2 Bullion Roses the same - but I always love them.  Start with 2 or 3 French Knots (2 wraps) or Colonial Knots for the center.  Look closely at the above photo and you will see that there are 3 Bullion Knots that wrap around the center.  Just keep adding Bullion Knots around the center until the "rose" is the size you want.
2.  Add the woven Spider Web flower between the bullion rose and the wing.
3.  Add "filler" stitches:  short stems using stem stitch, fly stitch, Lazy Daisy, and French Knots.

Right Bird Tail:
Back Stitch around the outside of the tail and then add a row of Wheat Ear Stitch down the center of the tail.  Change to a contrasting color and add a Bullion Knot in the center of each loop and a French Knot at the end of each straight stitch.


Wings:
1. Begin by Back Stitching a line across the wing.  Change to a contrasting colored thread and weave over and under the Back Stitches.
2. Using the same color thread as the Back Stitched line, add Fly Stitches above and below the line.
3.  Add a Lazy Daisy inside the "v" of each Fly Stitch with the same color used to weave the Back Stitched Line.
4.  Outline the wing with Bullion Knots, adding 3 long Drizzle Stitches at the wing point.

When you have finished embellishing the leaves on the branch and the birds, sew the TOP of Block 3 to the BOTTOM of Block 1 by machine with a 1/4" seam allowance.  Press the seam open, being careful not to crush any embroidery stitches.

Note:  I recommend using a Strip Stick when pressing the seams.
If your local quilt shop doesn't carry this handy tool 
you can buy it by clicking here and there is even a video 
on the Strip Stick website.

Leaves and red flowers:
Applique the leaves and red flowers than continue from Block 1 and stitch the stemswith Palestrina Stitch.

See that small green leaf pinned to the left side of Block 3?  I will add that to the bottom of the branch when I sew Block 3 to Block 5.